


Hello everyone and welcome to my Blog! Today’s post is about funky DIY paper bookmarks, these bookmarks are super cute and very easy to make. Let’s begin:
Things you will need
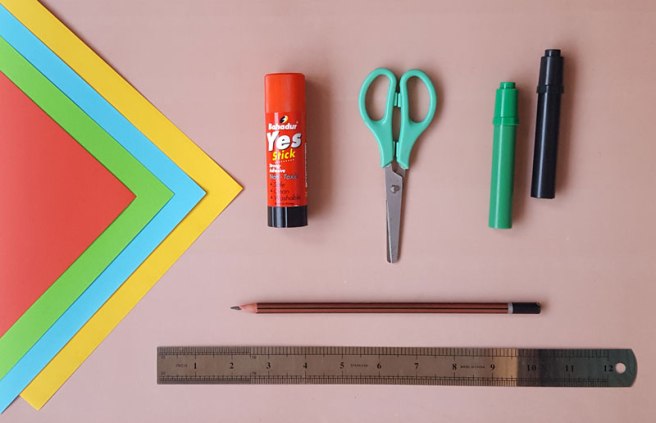
- Origami papers
- Ruler
- Glue stick
- Lead Pencil
- Scissors
- Marker Pen
Step 1
Take a 6×6 origami paper of your own color choice, then take one corner and bring out to the top corner.


Step 2
Take right and left corners toward the upper corner and then bring them back so that you obtained a square shape in the middle.


Step 3
Now take the upper corner to the lower corner of the square. So you can obtain this type of shape.

Step 4
In this step, take the right corner, fold it over and tuck it inside the triangle shape, and then repeat on the other side.
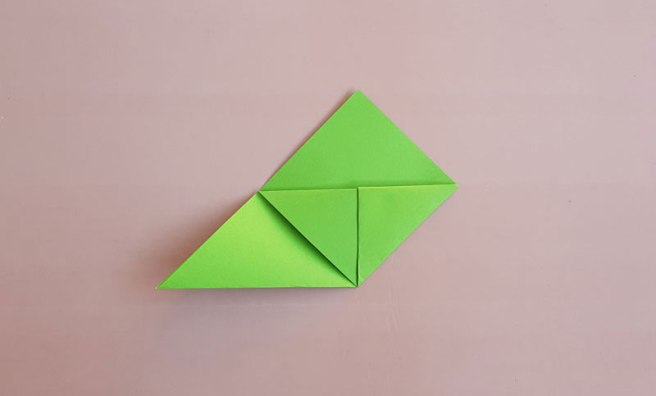
Step 5
Now you have a basic shape, look like this. You can decorate it in the way you like it.

Step 6
In the final step, cut the eyes, teeth and tongue of the monster and paste them. Take a black pen and draw the eyeballs.


Final Look


Hope you like this step by step tutorial. Have a great day!
(Note: This idea is taken from a YouTube channel Red Ted Art)

Aw this is such a great idea!
LikeLiked by 1 person
Yeah 😍
LikeLike
These look so cute i’m definitely doing this ! 😀
LikeLiked by 1 person
Yes you should 😊
LikeLike
Lovely, I have some like these inspired by Harry Potter on my blog too!
do check ’em out and tell me if you like ’em ❤
LikeLiked by 1 person
Oh yes I will check. Thanks for stopping by 🙂
LikeLike